Running Open WebUI and Ollama on Ubuntu 22.04 for a Local ChatGPT Experience
- Steve Scargall
- How to
- May 10, 2024
Introduction
Open WebUI and Ollama are powerful tools that allow you to create a local chat experience using GPT models. Whether you’re experimenting with natural language understanding or building your own conversational AI, these tools provide a user-friendly interface for interacting with language models. In this guide, we’ll walk you through the installation process step by step.
Ollama is a cutting-edge platform designed to run open-source large language models locally on your machine. It simplifies the complexities involved in deploying and managing these models, making it an attractive choice for researchers, developers, and anyone who wants to experiment with language models1. Ollama provides a user-friendly interface for running large language models (LLMs) locally, specifically on MacOS and Linux (with Windows support on the horizon).
Open WebUI is an extensible, feature-rich, and user-friendly self-hosted WebUI designed to operate entirely offline. It supports various large language model (LLM) runners, including Ollama and OpenAI-compatible APIs.
Prerequisites
Before we dive into the installation, make sure you have the following prerequisites:
- System Requirements:
- Your system can be CPU-only, or you may have an NVIDIA or AMD GPU.
- We’ll be using Ubuntu 22.04 as the operating system.
- At least 4 vCPUs, 8 or more is recommended.
- You should have at least 8 GB of RAM available to run the 7B models, 16 GB to run the 13B models, and 32 GB to run the 33B models.
- Software:
Installation Steps
1. Install or Upgrade Docker Engine on Ubuntu
Follow Install Docker Engine on Ubuntu to install or upgrade Docker on your Ubuntu system.
2. Install GPU support for Docker
2.1 NVidia Container Runtime for Docker
The NVIDIA Container Runtime for Docker is an improved mechanism for allowing the Docker Engine to support NVIDIA GPUs used by GPU-accelerated containers. This new runtime replaces the Docker Engine Utility for NVIDIA GPUs.
Follow the official NVidia documentation to Install or Upgrade the NVidia Container Runtime for Docker .
3. Install OpenWebUI and Ollama
There are several installation methods available depending on your environment. Use one of the options described below:
[Option 1] Installing Open WebUI with Bundled Ollama Support
This is the easiest and recommended method. This installation method uses a single container image that bundles Open WebUI with Ollama, allowing for a streamlined setup via a single command. Choose the appropriate command based on your hardware environment:
- With NVidia GPU and CUDA Support: Utilize GPU resources by running the following command:
sudo docker run -d -p 3000:8080 --gpus=all -v ollama:/root/.ollama -v open-webui:/app/backend/data --name open-webui --restart always ghcr.io/open-webui/open-webui:cuda
- With GPU Support: Utilize GPU resources by running the following command:
sudo docker run -d -p 3000:8080 --gpus=all -v ollama:/root/.ollama -v open-webui:/app/backend/data --name open-webui --restart always ghcr.io/open-webui/open-webui:ollama
- For CPU Only: If you’re not using a GPU, use this command instead:
sudo docker run -d -p 3000:8080 -v ollama:/root/.ollama -v open-webui:/app/backend/data --name open-webui --restart always ghcr.io/open-webui/open-webui:ollama
Verify the Docker instance is running:
$ sudo docker ps
CONTAINER ID   IMAGE                                  COMMAND           CREATED             STATUS             PORTS                                       NAMES
984c0d7006ef   ghcr.io/open-webui/open-webui:ollama   "bash start.sh"   About an hour ago   Up About an hour   0.0.0.0:3000->8080/tcp, :::3000->8080/tcp   open-webui
[Option 2] Installation with the Default Open WebUI Configuration using a separate Ollama instance
Install Ollama using:
curl -fsSL https://ollama.com/install.sh | sh
With Ollama now installed, use this command to start Open WebUI:
sudo docker run -d -p 3000:8080 --add-host=host.docker.internal:host-gateway -v open-webui:/app/backend/data --name open-webui --restart always ghcr.io/open-webui/open-webui:main
- To connect to Ollama on a remote server, change the OLLAMA_BASE_URL to the remote server’s URL:
sudo docker run -d -p 3000:8080 -e OLLAMA_BASE_URL=https://example.com -v open-webui:/app/backend/data --name open-webui --restart always ghcr.io/open-webui/open-webui:main
- To run Open WebUI with Nvidia GPU support, use this command:
sudo docker run -d -p 3000:8080 --gpus all --add-host=host.docker.internal:host-gateway -v open-webui:/app/backend/data --name open-webui --restart always ghcr.io/open-webui/open-webui:cuda
Verify the Docker instance is running:
$ sudo docker ps
CONTAINER ID   IMAGE                                  COMMAND           CREATED             STATUS             PORTS                                       NAMES
984c0d7006ef   ghcr.io/open-webui/open-webui:ollama   "bash start.sh"   About an hour ago   Up About an hour   0.0.0.0:3000->8080/tcp, :::3000->8080/tcp   open-webui
[Option 3] Install using Docker Compose
1. Start by cloning the OpenWebUI GitHub repository:
git clone https://github.com/open-webui/open-webui
cd open-webui
2. Choosing the Appropriate Docker Compose File
OpenWebUI provides several Docker Compose files for different configurations. Depending on your hardware, choose the relevant file:
docker-compose.amdgpu.yaml: For AMD GPUsdocker-compose.api.yaml: For API-only setupdocker-compose.data.yaml: For data servicesdocker-compose.gpu.yaml: For NVIDIA GPUsdocker-compose.yaml: Default configuration
3. Starting the Docker Environment
Execute the following command to start the Docker Compose setup:
sudo docker compose -v open-webui:/app/backend/data -f docker-compose.yaml up
Verify the Docker instance is running:
$ sudo docker ps
CONTAINER ID   IMAGE                                  COMMAND           CREATED             STATUS             PORTS                                       NAMES
984c0d7006ef   ghcr.io/open-webui/open-webui:ollama   "bash start.sh"   About an hour ago   Up About an hour   0.0.0.0:3000->8080/tcp, :::3000->8080/tcp   open-webui
Remember to access documents via /data/docs to prevent data loss when the container stops.
4. Access the User Interface
Open your web browser and navigate to:
http://<your-host-IP>:3000
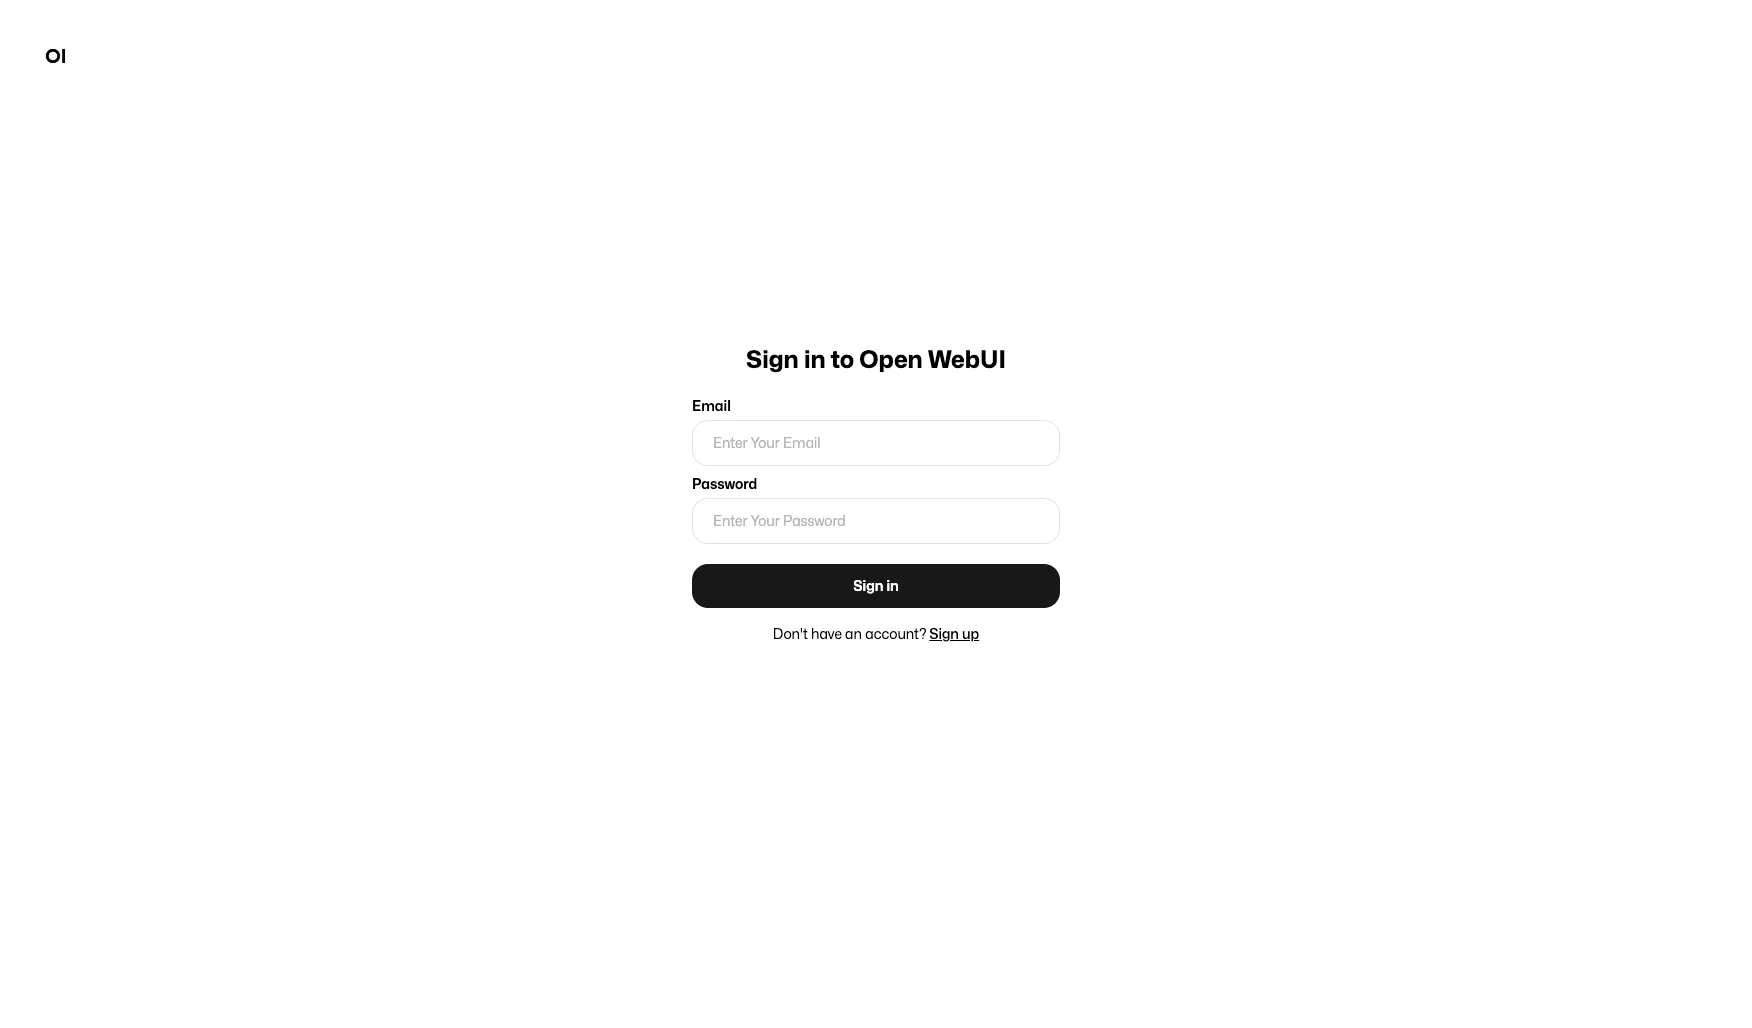
You should see the Login page:
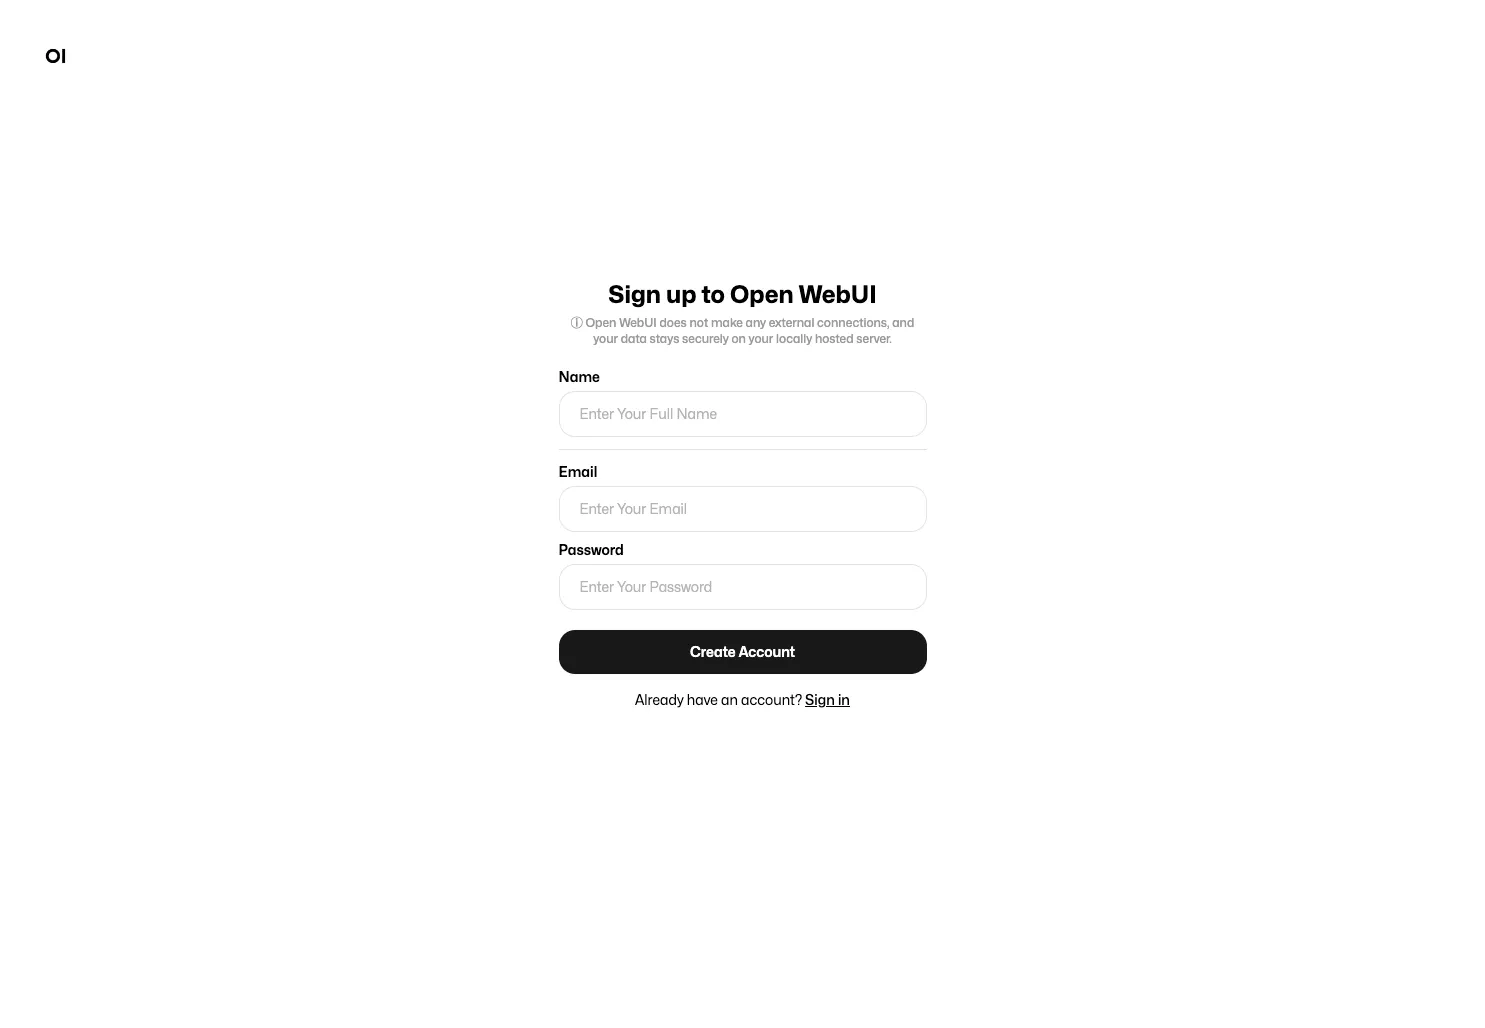
5. Create a New User
Click “Sign up” to create a new local user account. Enter your Name, EMail, and Password, then click “Create Acccount”.
You will be automatically logged in and taken to the home page.
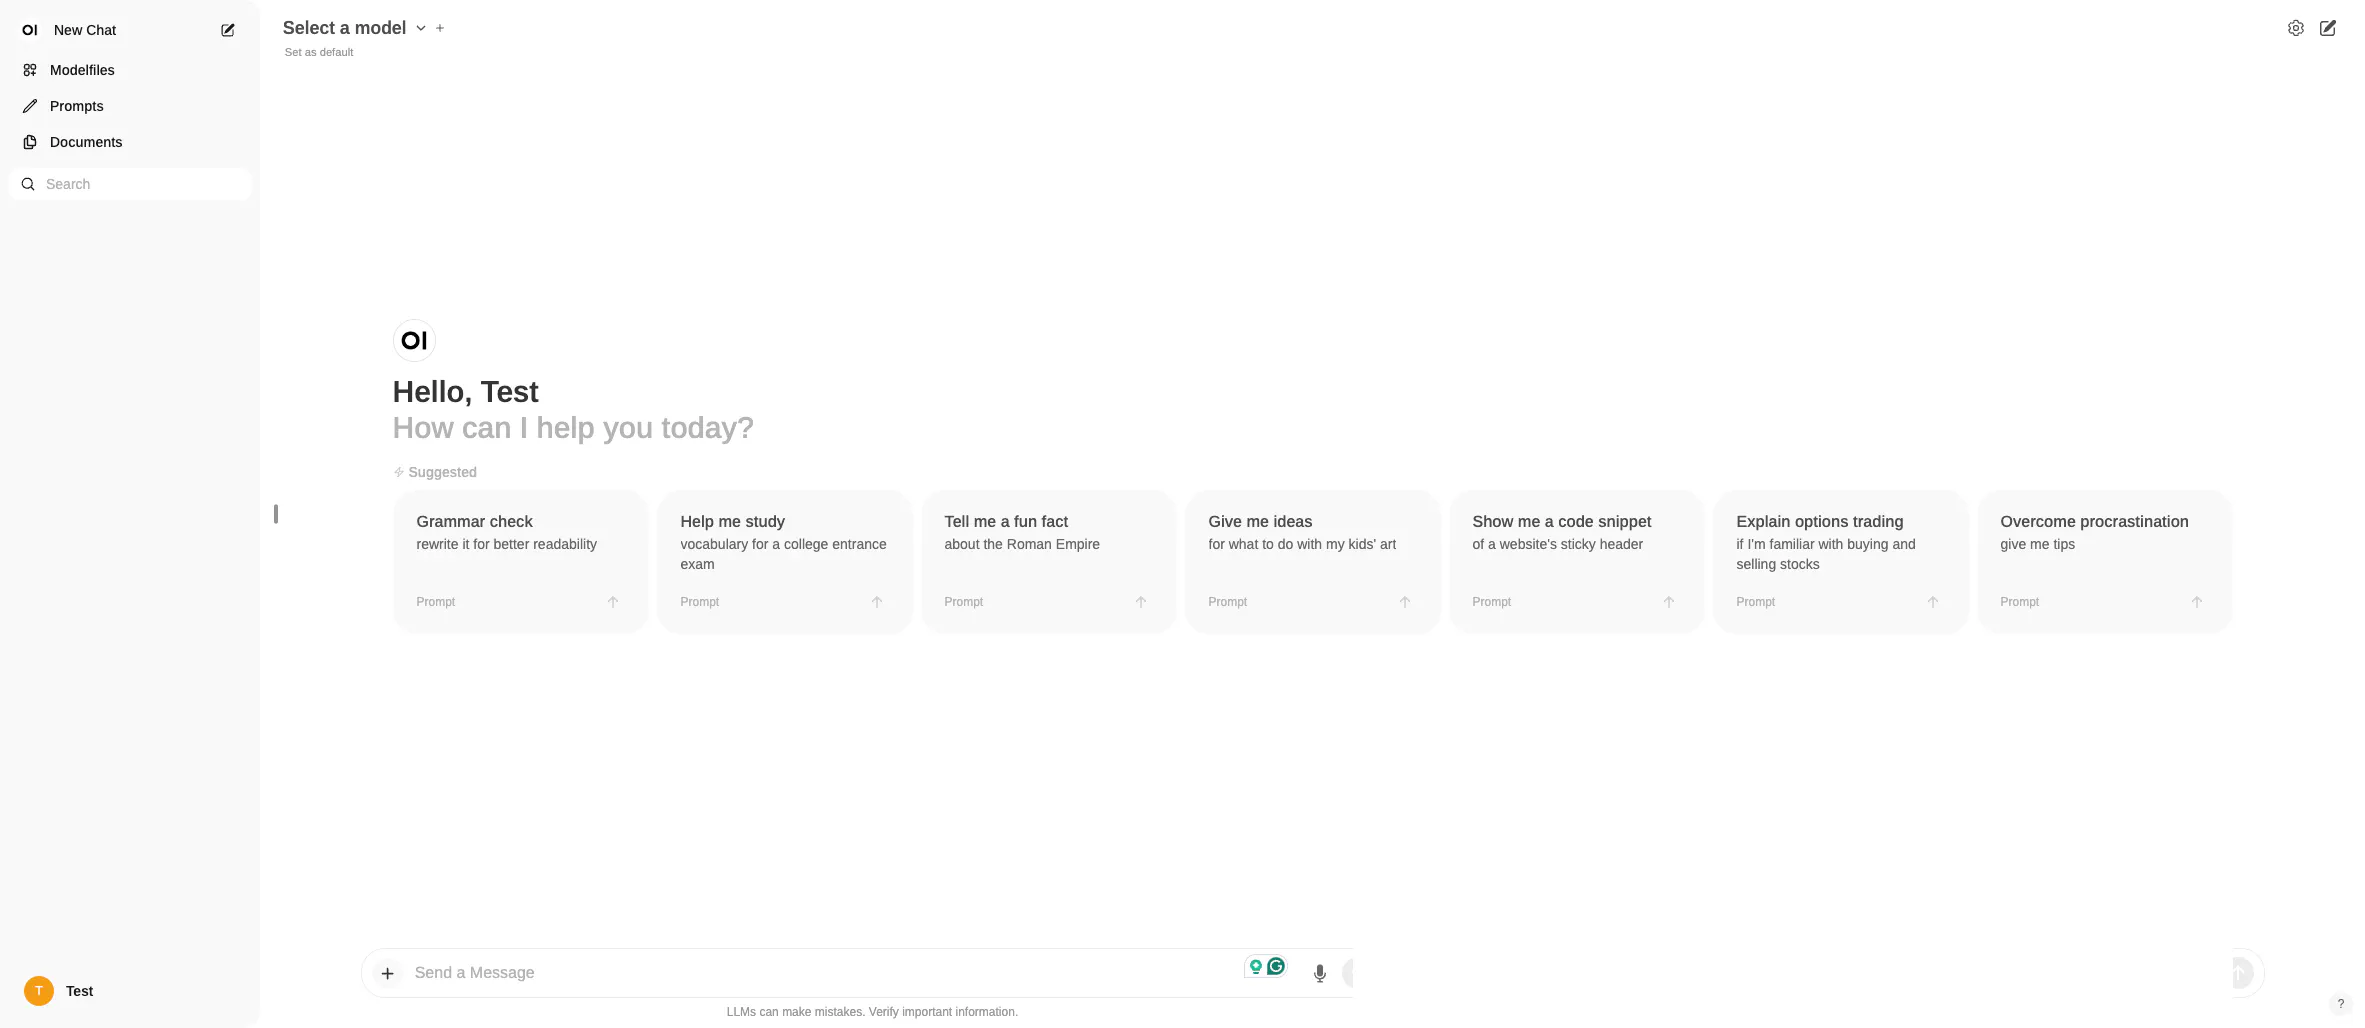
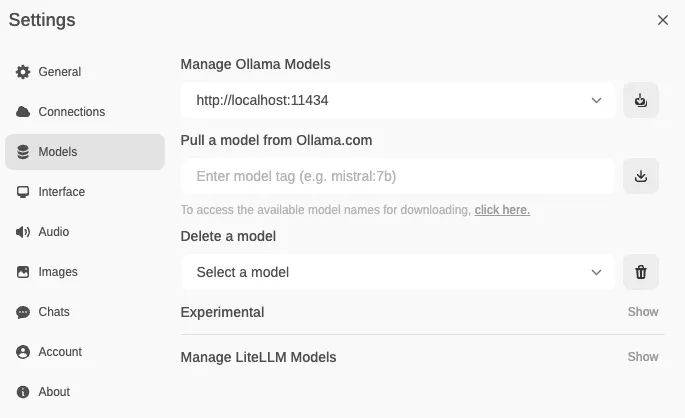
6. Downloading Ollama Models
There is a growing list of models to choose from. Explore the models available on Ollama’s library .
Import one or more model into Ollama using Open WebUI:
- Click the “+” next to the models drop-down in the UI.
- Alternatively, go to Settings -> Models -> “Pull a model from Ollama.com.”
Conclusion
Congratulations! You’ve successfully set up Open WebUI and Ollama for your local ChatGPT experience. Feel free to explore the capabilities of these tools and customize your chat environment. Happy chatting!