Fastfetch: The Speedy Successor Neofetch Replacement Your Ubuntu Terminal Needs
- Steve Scargall
- Linux , Ubuntu , How to
- April 24, 2025
If you love customizing your Linux terminal and getting a quick, visually appealing overview of your system specs, you might have used neofetch in the past. However, neofetch is now deprecated and no longer actively maintained. A fantastic, actively maintained alternative is Fastfetch – known for its speed, extensive customization options, and feature set.
While you might be able to install Fastfetch on Ubuntu 22.04 (Jammy Jellyfish) using the standard sudo apt install fastfetch, the version available in the default Ubuntu repositories is often outdated. To get the latest features, bug fixes, and performance improvements, you’ll want to use a different method.
This guide presents two reliable ways to install a newer version of Fastfetch on Ubuntu 22.04:
- Manual Installation: Downloading the
.debpackage directly from GitHub Releases. - PPA Method: Adding a Personal Package Archive (PPA) for easier installation and updates via
apt.
Choose the method that best suits your needs!
Prerequisites
- An Ubuntu 22.04 LTS system (or newer for the PPA method).
- Access to the terminal.
sudoprivileges (administrator rights).- An internet connection.
Method 1: Manual Installation via DEB Package
This method gives you precise control over the version you install directly from the official GitHub source.
Navigate to the GitHub Releases Page: Open your web browser and go to the official Fastfetch releases page: https://github.com/fastfetch-cli/fastfetch/releases
Locate the Latest Release: Find the latest stable release (usually at the top).
Find the Correct DEB File: Under the “Assets” section, look for the
.debfile built for 64-bit Debian/Ubuntu systems, e.g.,fastfetch-linux-amd64.deb.Download the File: Copy the link address from the GitHub page, open your terminal, and use
wget:wget https://github.com/fastfetch-cli/fastfetch/releases/download/2.41.0/fastfetch-linux-amd64.debInstall the DEB package: Use
sudo dpkg -ifollowed by the downloaded filename:sudo dpkg -i fastfetch-linux-amd64.debThis command attempts to install the package but might fail due to missing dependencies.
Resolve missing dependencies:
dpkgdoesn’t automatically handle dependencies. Useaptto fix this:sudo apt --fix-broken install -yThis command downloads and installs any libraries Fastfetch needs from the Ubuntu repositories.
Verify fastfetch works: Run
fastfetchorsudo fastfetch. You should see the colorful system information output.
Method 2: Installing via PPA (Recommended for Easier Updates)
Using a Personal Package Archive (PPA) allows you to install Fastfetch using apt and receive updates automatically when you run sudo apt update && sudo apt upgrade. This PPA is maintained for Ubuntu 22.04 and newer.
Add the Fastfetch PPA: Open your terminal and run the following command to add the PPA to your system’s software sources:
sudo add-apt-repository ppa:zhangsongcui3371/fastfetchUpdate Package Lists After adding the PPA, you need to refresh your system’s package list so it knows about the packages available from the new source:
sudo apt updateInstall Fastfetch from the PPA: You can install Fastfetch using the standard
aptcommand. Since the PPA likely contains a newer version than the default Ubuntu repositories,aptwill prefer the PPA version:sudo apt install fastfetch -yVerify fastfetch works: Run
fastfetchorsudo fastfetch. You should see the colorful system information output.
(Optional) Updating and Uninstalling
Updating (DEB Method): Repeat Steps 1-3 of Method 1 with the newer
.debfile.Updating (PPA Method): Simply run the standard system update commands. The PPA ensures you get the latest Fastfetch version it provides:
sudo apt update
sudo apt upgrade
Uninstalling (Either Method): Use
aptto remove the package:sudo apt remove fastfetch(Optional) Removing the PPA: If you used Method 2 and want to remove the PPA (e.g., before uninstalling):
sudo add-apt-repository --remove ppa:zhangsongcui3371/fastfetch
sudo apt update
Fastfetch Examples
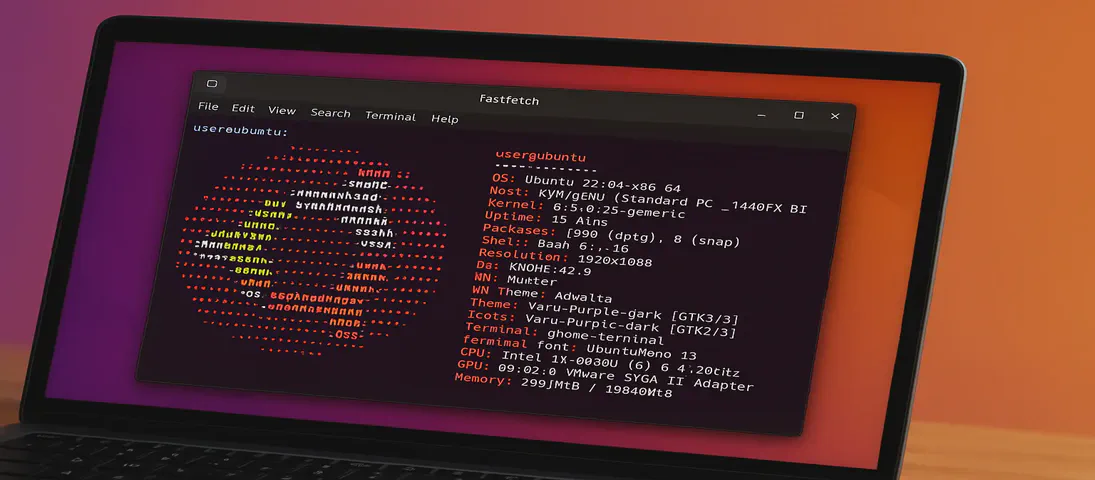
Fastfetch is incredibly powerful and configurable right from the command line. While simply running fastfetch gives you an excellent default output, here are some examples to help you explore its capabilities further.
Remember that Fastfetch has many options. These examples cover some everyday use cases:
Basic System Information: Displays the default configured system information.
fastfetchGet Help: This command shows all available command-line options and arguments. It’s the best place to start if you want to explore more!
fastfetch --helpList Available Information Modules: See all the different pieces of information Fastfetch can potentially display (like OS, Kernel, CPU, GPU, Memory, Disk, etc.).
fastfetch --list-modulesList Available Configuration Presets: Fastfetch comes with several pre-made configuration layouts. This command lists them.
fastfetch --list-presetsUse a Specific Preset: Load one of the pre-made configuration layouts. For example, to use the minimal preset:
fastfetch -c minimal(Try others like
laptop,dev, orallafter listing them!)List Available ASCII Logos: See the extensive list of distribution and hardware logos Fastfetch can display.
fastfetch --list-logosUse a Specific Logo: Override the default logo. For example, to use the ‘debian’ logo regardless of your actual distribution:
fastfetch -l debian(Replace
debianwith any name from the--list-logosoutput).Disable the Logo: Run Fastfetch without displaying any ASCII art logo.
fastfetch --logo noneShow Specific Modules: Display only the modules you specify, separated by colons (:).
fastfetch -s OS:Host:Kernel:CPU:GPU:Memory(Use module names from the
--list-modulesoutput).Show System Colors: Displays the 8 primary terminal colors and their codes.
fastfetch --show-colorsGenerate a User Configuration File: Creates a default configuration file at ~/.config/fastfetch/config.jsonc (or config.jsonc inside $XDG_CONFIG_HOME/fastfetch). You can then edit this file to customize Fastfetch’s output permanently.
fastfetch --gen-config(Note: This command only generates the file; it doesn’t show system info immediately.)
Fastfetch offers a wealth of customization. Don’t hesitate to use fastfetch—-help to discover all the flags and options available to tailor the output exactly to your liking.