How To
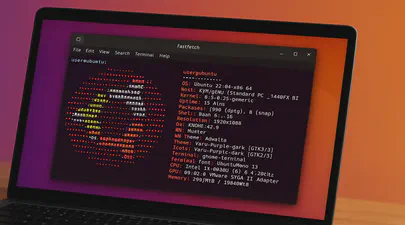
Fastfetch: The Speedy Successor Neofetch Replacement Your Ubuntu Terminal Needs
If you love customizing your Linux terminal and getting a quick, visually appealing overview of your system specs, you might have used neofetch in the past. However, neofetch is now deprecated and no longer actively maintained. A fantastic, actively maintained alternative is Fastfetch – known for its speed, extensive customization options, and feature set.
While you might be able to install Fastfetch on Ubuntu 22.04 (Jammy Jellyfish) using the standard sudo apt install fastfetch, the version available in the default Ubuntu repositories is often outdated. To get the latest features, bug fixes, and performance improvements, you’ll want to use a different method.

A Step-by-Step Guide on Using Cloud Images with QEMU 9 on Ubuntu 24.04
Introduction
Cloud images are pre-configured, optimized templates of operating systems designed specifically for cloud and virtualized environments. Cloud images are essentially vanilla operating system installations, such as Ubuntu, with the addition of the cloud-init package. This package enables run-time configuration of the OS through user data, such as text files on an ISO filesystem or cloud provider metadata. Using cloud images significantly reduces the time and effort required to set up a new virtual machine. Unlike ISO images, which require a full installation process, cloud images boot up immediately with the OS pre-installed

Understanding Memory Usage with `smem`
Memory management is crucial for Linux administrators and developers, especially when optimizing performance for resource-intensive applications. While tools like top and htop are commonly used to monitor system performance, they often don’t provide enough detail regarding memory usage breakdown. This is where smem comes into play.
What is smem?
smem is a command-line tool that reports memory usage per process and provides better insight into shared memory than most traditional tools, taking shared memory pages into account. Unlike top or htop, which primarily display RSS (Resident Set Size), smem can also show USS (Unique Set Size), which is a better metric for understanding how much memory would be freed if a particular process were terminated. This blog will guide you through using smem, explaining these critical memory metrics and providing comparisons to more familiar tools.

Benchmarking GPUs: Measuring Throughput between CPU and GPU
This article was inspired by a LinkedIn post by Dennis Kennetz . The CPU to GPU bandwidth check is available on GitHub which uses a specific flow to assess the data transfer rates. Like many in the industry, my focus is on AI and ML workloads and how we can improve efficiencies and performance using DRAM, CXL, CPU, GPUs, and software improvements.
In the rapidly evolving landscape of artificial intelligence (AI) and machine learning (ML), the ability to process vast amounts of data efficiently is paramount. As AI models grow in complexity and size, the demand for high-performance computing resources intensifies. At the heart of this demand lies the crucial task of optimizing data transfers between various components of a computing system, particularly from DRAM, CPU, and emerging technologies like CXL (Compute Express Link) to and from the GPU.
Read More
Running Open WebUI and Ollama on Ubuntu 22.04 for a Local ChatGPT Experience
Introduction
Open WebUI and Ollama are powerful tools that allow you to create a local chat experience using GPT models. Whether you’re experimenting with natural language understanding or building your own conversational AI, these tools provide a user-friendly interface for interacting with language models. In this guide, we’ll walk you through the installation process step by step.
Ollama is a cutting-edge platform designed to run open-source large language models locally on your machine. It simplifies the complexities involved in deploying and managing these models, making it an attractive choice for researchers, developers, and anyone who wants to experiment with language models1. Ollama provides a user-friendly interface for running large language models (LLMs) locally, specifically on MacOS and Linux (with Windows support on the horizon).
Read More
A Practical Guide to Identify Compute Express Link (CXL) Devices in Your Server
In this article, we will provide four methods for identifying CXL devices in your server and how to determine which CPU socket and NUMA node each CXL device is connected. We will use CXL memory expansion (CXL.mem) devices for this article. The server was running Ubuntu 22.04.2 (Jammy Jellyfish) with Kernel 6.3 and ‘cxl-cli ’ version 75 built from source code. Many of the procedures will work on Kernel versions 5.16 or newer.
Read MoreHow To Install a Mainline Linux Kernel in Ubuntu
Note: This article was updated on Thursday, July 31st, 2025 and will work with newer Ubuntu releases.
By default, Ubuntu systems run with the Ubuntu kernels provided by the Ubuntu repositories. To get unmodified upstream kernels that have new features or to confirm that upstream has fixed a specific issue, we often need to install the mainline Kernel. The mainline kernel is the most recent version of the Linux kernel released by the Linux Kernel Organization. It undergoes several stages of development, including merge windows, release candidates, and final releases. Mainline kernels are designed to offer the latest features and improvements, making them attractive to developers and power users. Kernel.org lists the available Kernel versions.
Read More
How To Map a CXL Endpoint to a CPU Socket in Linux
When working with CXL Type 3 Memory Expander endpoints, it’s nice to know which CPU Socket owns the root complex for the endpoint. This is very useful for memory tiering solutions where we want to keep the execution of application processes and threads ’local’ to the memory.
CXL memory expanders appear in Linux as memory-only or cpu-less NUMA Nodes. For example, NUMA nodes 2 & 3 do not have any CPUs assigned to them.
Read More
Linux NUMA Distances Explained
TL;DR: The memory latency distances between a node and itself is normalized to 10 (1.0x). Every other distance is scaled relative to that 10 base value. For example, the distance between NUMA Node 0 and 1 is 21 (2.1x), meaning if node 0 accesses memory on node 1 or vice versa, the access latency will be 2.1x more than for local memory.
Introduction
Non-Uniform Memory Access (NUMA) is a multiprocessor model in which each processor is connected to dedicated memory but may access memory attached to other processors in the system. To date, we’ve commonly used DRAM for main memory, but next-gen platforms will begin offering High-Bandwidth Memory (HBM) and Compute Express Link (CXL) attached memory. Accessing remote (to the CPU) memory takes much longer than accessing local memory, and not all remote memory has the same access latency. Depending on how the memory architecture is configured, NUMA nodes can be multiple hops away with each hop adding more latency. HBM and CXL devices will appear as memory-only (CPU-less) NUMA nodes.
Read More
Using Linux Kernel Memory Tiering
In this post, I’ll discuss what memory tiering is, why we need it, and how to use the memory tiering feature available in the mainline v5.15 Kernel.
What is Memory Tiering?
With the advent of various new memory types, some systems will have multiple types of memory, e.g. High Bandwidth Memory (HBM), DRAM, Persistent Memory (PMem), CXL and others. The Memory Storage hierarchy should be familiar to you.

Memory Storage Hierarchy
Read More
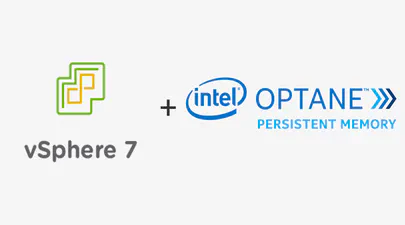
How To map VMWare vSphere/ESXi PMem devices from the Host to Guest VM
In this post, we’ll use VMWare ESXi 7.0u3 to create a Guest VM running Ubuntu 21.10 with two Virtual Persistent Memory (vPMem) devices, then show how we can map the vPMem device in the host (ESXi) to “nmem” devices in the guest VM as shown by the ndctl utility.
If you’re new to using vPMem or need a refresher, start with the VMWare Persistent Memory documentation.
Table of Contents
- Create a Guest VM with vPMem Devices
- Install the Guest OS
- Install ndctl
- Mapping the NVDIMMs in the guest to devices in the ESXi Host
- Summary
Create a Guest VM with vPMem Devices
The procedure you use may be different from the one shown below if you use vSphere or an automated procedure.
Read MoreHow To Emulate CXL Devices using KVM and QEMU
What is CXL?
Compute Express Link (CXL) is an open standard for high-speed central processing unit-to-device and CPU-to-memory connections, designed for high-performance data center computers. CXL is built on the PCI Express physical and electrical interface with protocols in three areas: input/output, memory, and cache coherence.
CXL is designed to be an industry open standard interface for high-speed communications, as accelerators are increasingly used to complement CPUs in support of emerging applications such as Artificial Intelligence and Machine Learning.
Read More
How To Build a custom Linux Kernel to test Data Access Monitor (DAMON)
DAMON is a data access monitoring framework subsystem for the Linux kernel. DAMON (Data Access MONitor) tool monitors memory access patterns specific to user-space processes introduced in Linux kernel 5.15 LTS, such as operation schemes, physical memory monitoring, and proactive memory reclamation. It was designed and implemented by Amazon AWS Labs and upstreamed into the 5.15 Kernel , but it was not enabled by default.cd /boot
Keen to try this new feature to identify the working set size (Active Memory) of a server or process, this post documents the steps I took to build a custom Kernel with DAMON enabled using Fedora Server 35.
Read More
How To Enable Debug Logging in ipmctl
The ipmctl utility is used for configuring and managing Intel Optane Persistent Memory modules (DCPMM/PMem). It supports the functionality to:
- Discover Persistent Memory on the server
- Provision the persistent memory configuration
- View and update the firmware on the persistent memory modules
- Configure data-at-rest security
- Track health and performance of the persistent memory modules
- Debug and troubleshoot persistent memory modules
I wrote the IPMCTL User Guide showing how to use the tool, but what if ipmctl returns an error or something you’re not expecting? How do you debug the debugger? On Linux, ipmctl relies on libndctl to help perform communication to the BIOS and persistent memory modules themselves. This is a complicated stack involving multiple kernel drivers and the physical hardware itself. Anything along this path could be causing a problem.
Read More
How To Install Prometheus and Grafana on Fedora Server
[Updated] This article was updated on 03/13/2021 using Fedora Server 33, Prometheus v2.25.0, Grafana v7.4.3, and Node Exporter v1.1.2.
In this article, we will show how to install Prometheus and Grafana to collect and display system performance metrics.
Prometheus is an open source monitoring and alerting toolkit for bare metal systems, virtual machines, containers, and microservices. Grafana allows you to query, visualize, and alert on metrics using fully customizable dashboards .
Read More
How To Monitor Persistent Memory Performance on Linux using PCM, Prometheus, and Grafana
In a previous article, I showed How To Install Prometheus and Grafana on Fedora Server . This article demonstrates how to use the open-source Process Counter Monitor (PCM) utility to collect DRAM and Intel® Optane™ Persistent Memory statistics, and visualize the data in Grafana.
Processor Counter Monitor is an application programming interface (API) and a set of tools based on the API to monitor performance and energy metrics of Intel® Core™, Xeon®, Atom™ and Xeon Phi™ processors. It can also show memory bandwidth for DRAM and Intel Optane Persistent Memory devices. PCM works on Linux, Windows, Mac OS X, FreeBSD and DragonFlyBSD operating systems.
Read MoreUsing ltrace to see what ipmctl and ndctl are doing
Occasionally, it is necessary to debug commands that are slow. Or you may simply be interested in learning how the tools work. While there are many strategies, here are some simple methods that show code flow and timing information.
To show a high-level view of where the time is being spent within libipmctl, use:
# ltrace -c -o ltrace_library_count.out -l '*ipmctl*' ipmctl show -memoryresources
To show a high-level view of where the time is being spent within libndctl, use:
Read More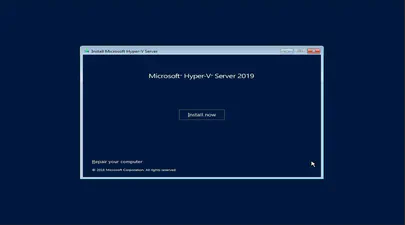
How To Install and Boot Microsoft Hyper-V 2019 from Persistent Memory (or not)
In a previous post I described how to install and boot Fedora Linux using only Persistent Memory, no SSDs are required. For this follow on post, I attempted to install Microsoft Windows Server 2022 onto the persistent memory.
TL;DR - I was able to select the PMem devices as the install disk, but when the installer begins to write data, we get an “Error code: 0xC0000005”. I haven’t found a solution to this problem (yet).
Read More
How To Install and Boot Microsoft Windows Server 2019 from Persistent Memory
In a previous post I described how to install and boot Fedora Linux using only Persistent Memory, no SSDs are required. For this follow on post, I attempted to install Microsoft Windows Server 2019 and 2022 onto the persistent memory.
TL;DR - I was able to select the PMem devices as the install disk, but when the installer begins to write data, we get an “Error code: 0xC0000005”. I haven’t found a solution to this problem (yet).
Read More
How To Install and Boot Microsoft Windows Server 2022 from Persistent Memory (or not)
In a previous post I described how to install and boot Fedora Linux using only Persistent Memory, no SSDs are required. For this follow on post, I attempted to install Microsoft Windows Server 2022 onto the persistent memory.
TL;DR - I was able to select the PMem devices as the install disk, but when the installer begins to write data, we get an “Error code: 0xC0000005”. I haven’t found a solution to this problem (yet).
Read More
How To Install and Boot Microsoft Hyper-V 2019 from Persistent Memory (or not)
In a previous post I described how to install and boot Fedora Linux using only Persistent Memory, no SSDs are required. For this follow on post, I attempted to install Microsoft Windows Server 2022 onto the persistent memory.
TL;DR - I was able to select the PMem devices as the install disk, but when the installer begins to write data, we get an “Error code: 0xC0000005”. I haven’t found a solution to this problem (yet).
Read More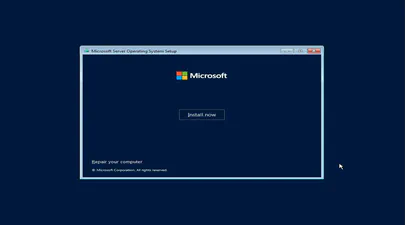
How To Install and Boot Microsoft Windows Server 2022 from Persistent Memory (or not)
In a previous post I described how to install and boot Fedora Linux using only Persistent Memory, no SSDs are required. For this follow on post, I attempted to install Microsoft Windows Server 2022 onto the persistent memory.
TL;DR - I was able to select the PMem devices as the install disk, but when the installer begins to write data, we get an “Error code: 0xC0000005”. I haven’t found a solution to this problem (yet).
Read More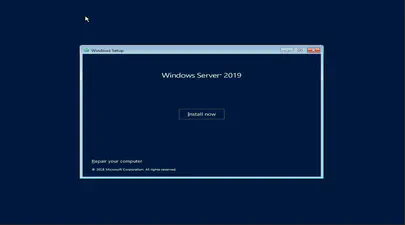
How To Install and Boot Microsoft Windows Server 2019 from Persistent Memory
In a previous post I described how to install and boot Fedora Linux using only Persistent Memory, no SSDs are required. For this follow on post, I attempted to install Microsoft Windows Server 2019 and 2022 onto the persistent memory.
TL;DR - I was able to select the PMem devices as the install disk, but when the installer begins to write data, we get an “Error code: 0xC0000005”. I haven’t found a solution to this problem (yet).
Read More
How to Boot Linux from Intel® Optane™ Persistent Memory
Introduction
In this article, I will demonstrate how to configure a system with Intel Optane Persistent Memory (PMem) and use part of the PMem as a boot device. This little known feature can reduce boot times for those that need it.
The basic steps include:
- Configure the Persistent Memory in AppDirect Interleaved
- Create two small SECTOR namespaces, one per Region
- Install the OS and select one or both of the namespaces (single disk install, or mirrored LVM)
Configure the Persistent Memory
The following figure shows how we will provision the persistent memory.
Read More
How to Boot Linux from Intel® Optane™ Persistent Memory
Introduction
In this article, I will demonstrate how to configure a system with Intel Optane Persistent Memory (PMem) and use part of the PMem as a boot device. This little known feature can reduce boot times for those that need it.
The basic steps include:
Configure the Persistent Memory in AppDirect Interleaved
Create two small SECTOR namespaces, one per Region
Install the OS and select one or both of the namespaces (single disk install, or mirrored LVM)
Read More
How To Install and Boot VMWare VSphere/ESXi from Persistent Memory (or not)
In a previous post I described how to install and boot Linux using only Persistent Memory, no SSDs are required. For this follow on post, I attempted to install VMWare VSphere/ESXi v7.0u2 onto the persistent memory.
TL;DR - It doesn’t work. The installer doesn’t list the PMem devices, and I was unable to find a way to manually select the PMem device(s).
I assume you followed the previous post to configure sector namespaces that we’ll use to install ESXi.
Read More
How to build an upstream Fedora Kernel from source
I typically keep my Fedora system current, updating it once every week or two. More recently, I wanted to test the Idle Page Tracking feature, but this wasn’t enabled in the default kernel provided by Fedora.
# grep CONFIG_IDLE_PAGE_TRACKING /boot/config-$(uname -r)
# CONFIG_IDLE_PAGE_TRACKING is not set
To enable the feature, we need to build a custom kernel with the feature(s) we need. Thankfully, the process isn’t too difficult.
For this walk through, I’ll be building a customised version of the Fedora 32 kernel version I already have installed (5.8.7-200.fc32.x86_64), using some of the instructions from https://fedoraproject.org/wiki/Building_a_custom_kernel .
Read More
Linux Device Mapper WriteCache (dm-writecache) performance improvements in Linux Kernel 5.8
The Linux ‘dm-writecache’ target allows for writeback caching of newly written data to an SSD or NVMe using persistent memory will achieve much better performance in Linux Kernel 5.8.
Red Hat developer Mikulas Patocka has been working to enhance the dm-writecache performance using Intel Optane Persistent Memory (PMem) as the cache device.
The performance optimization now queued for Linux 5.8 is making use of CLFLUSHOPT within dm-writecache when available instead of MOVNTI. CLFLUSHOPT is one of Intel’s persistent memory instructions that allows for optimized flushing of cache lines by supporting greater concurrency. The CLFLUSHOPT instruction has been supported on Intel servers since Skylake and on AMD since Zen.
Read More
How To Set Linux CPU Scaling Governor to Max Performance
The majority of modern processors are capable of operating in a number of different clock frequency and voltage configurations, often referred to as Operating Performance Points or P-states (in ACPI terminology). As a rule, the higher the clock frequency and the higher the voltage, the more instructions can be retired by the CPU over a unit of time, but also the higher the clock frequency and the higher the voltage, the more energy is consumed over a unit of time (or the more power is drawn) by the CPU in the given P-state. Therefore there is a natural trade-off between the CPU capacity (the number of instructions that can be executed over a unit of time) and the power drawn by the CPU.
Read More
How To Verify Linux Kernel Support for Persistent Memory
Linux Kernel support for persistent memory was first delivered in version 4.0 of the mainline kernel, however, it was not enabled by default until version 4.2.
If you use a Linux distribution that uses kernel 4.2 or later, or the distro backports features in to an older kernel, you will almost certainly have persistent memory support enabled by default. It is still worth verifying what features are enabled and disabled as this may vary by distro and release version for the very latest persistent memory features.
Read More
A Quick Guide to Signing Your Git Commits
It is important to sign Git commits for your source code to avoid the code being compromised and to confirm to the repository gatekeeper that you are who you say you are. Signing guarantees that my code is my work, it is my copyright and nobody else can fake it. This guide provides the necessary steps to creating private & public keys so you can sign your Git commits.
On Linux or Mac, if you have setup a development environment then you have all the necessary tools for signing.
Read More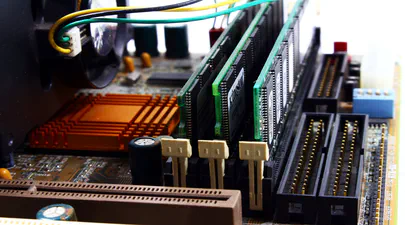
How To Extend Volatile System Memory (RAM) using Persistent Memory on Linux
Intel(R) Optane(TM) Persistent Memory delivers a unique combination of affordable large capacity and support for data persistence. Electrically compatible with DDR4, large capacity modules up to 512GB each can be installed in compatible servers alongside DDR on the memory bus.
Intel’s persistent memory product can be provisioned in a volatile “Memory Mode” which replaces DRAM volatile capacity with the persistent memory capacity, and persistent “AppDirect” mode which presents both DRAM and persistent memory to the operating system and applications. Both modes are explained in more detail here . It is possible to configure a system to utilize a percentage of persistent memory as volatile and persistent, but this mixed-mode still provisions all the DRAM capacity as a Last-Level Cache.
Read More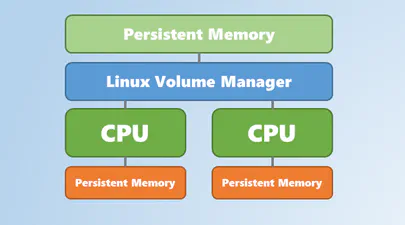
Using Linux Volume Manager (LVM) with Persistent Memory
In this article, we show how to use the Linux Volume Manager (LVM) to create concatenated, striped, and mirrored logical volumes using persistent memory modules as the backing storage device. Specifically, we will be using the Intel® Optane™ Persistent Memory Modules on a two socket system with Intel® Cascade Lake Xeon® CPUs, also referred to as 2nd Generation Intel® Xeon® Scalable Processors.
Contents

How to Create a Bootable Windows USB in Fedora Linux
In this tutorial, I am going to show you how to create a Windows Server 2019 bootable USB in Linux, though any Windows version will work. I am using Fedora 30 for this tutorial but the steps should be valid for other Linux distributions as well.
Here’s what you need:
Windows Server 2019 ISO (or Windows 10 ISO)
WoeUSB Application
A USB key (pen drive or stick) with at least 6 Gb of space
Read More